New release in my Remember me/ Auto Logins for Domino/ XWork project

Based on user feedback I got, I created a new release of my Remember me/ Auto Logins project on OpenNTF. This release contains the following changes:

  • Updated error handling in case the configuration could not be loaded correctly (e.g. in case of a missing configuration document). In that case the “remember me” checkbox is also disabled.
  • Sample login form updated for mobile usage.
  • Scheduled agent added to cleanup expired tokens (“Remove expired tokens”).
  • Added remote IP address to token document.
  • -Default- users don’t need the ‘write public documents’ option anymore.
  • UI Cleanup.

Auto Logins for IBM Domino/ XWork server (great for mobile apps!)

I just released version 1 of a new project of mine on OpenNTF. It is called “Auto Logins for IBM Domino/ XWork server“. You can use the application to add a “Remember me” option to any Domino/ XWork login screen. Based on an application setting the server can remember you for a number of days. When you re-visit the server, it recognizes you and will automatically log you in.

This is a great feature for any web (XPage) application, especially mobile web applications: it will make using the application a lot easier/ user friendlier.

The application uses the LTPA generator snippet that has recently been published on the XSnippet site by Serdar Başeğmez (thanks Serdar!). The algorithm that has been used for the remember me feature is described here.

I’ve written the application using a (customized) standard Domino login form and a couple of XPages (using managed beans). The user logging in is remembered by sending him a cookie. That cookie contains a token that is validated against a database of (hashed) tokens, including an expiration date. Note that the user’s password isn’t stored in any way or used in the cookie.

Update: The 1.0 release had local database encryption enabled. Download v1.01 for the version without encryption. 

Automatic synchronisation not working between NSF and on-disk projects

I finally found some time to experiment with how to use source control in Designer. First thing I did was to setup an on-disk project: right click an application and click Team Development > “Set up source control for this application”. I let it create an on-disk project and added/ changed/ removed some design elements.

From what I knew it should automatically synchronize all those changes with the on-disk version of the application. It didn’t…

Took me quite some time (including a Designer re-install) to figure out that this was caused by the fact that I turned of the “Build automatically” option. Apparently the synchronisation process is tied to the build process.

Before committing I’ll test and to be able to test I’ll have to build, so it’s not a big deal. Just something you have to be aware off…

Debugging XPages and SSJS just gotten a bit easier

Since there isn’t a way to debug SSJS (yet) I mostly resorted to using the print() statement throughout my code. One big disadvantage of this is that all statements are written to the server console. When developing with a team this can get messy (and won’t make your administrators happy), so I looked for a different way to output debug messages. I already use OpenLog to log information to a database, but find it annoying to switch everytime between Designer client, Notes client and browser.
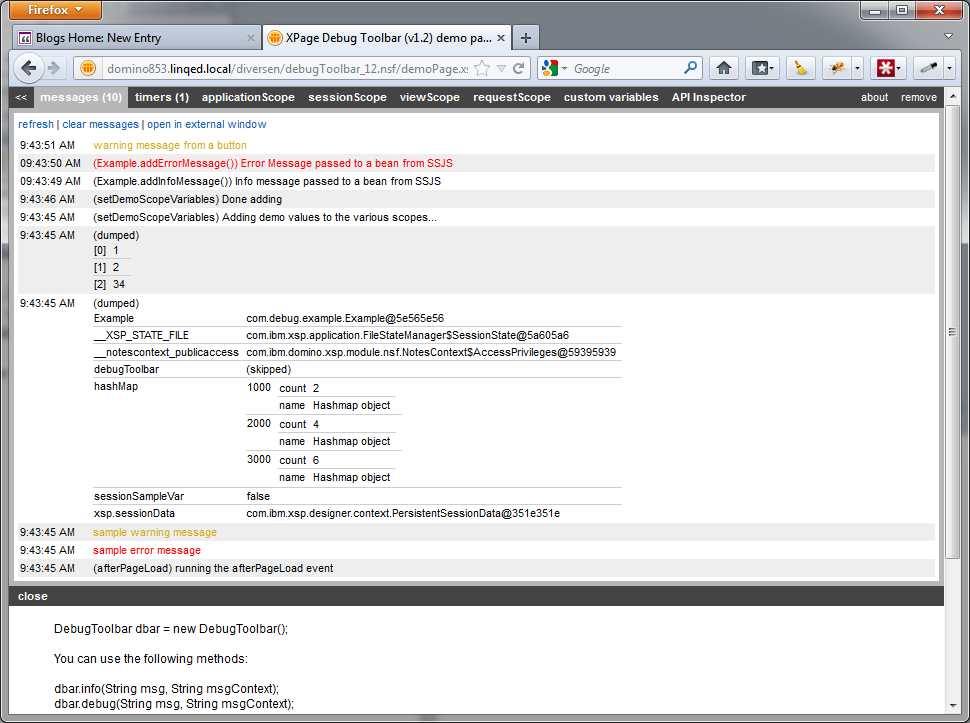
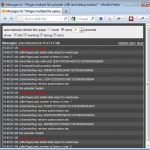
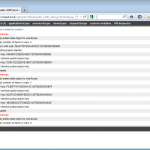
So I created the XPage Debug Toolbar: a toolbar that can be added on top of every XPage and that shows the log/ debug messages written to it. The messages are stored in the sessionScope, so they are unique to the current user and are stored when switching between pages. In the message tab you’ll also notice a “open in external window” link: this will open a seperate XPage (“debugToolbarConsole”) that you can leave open and that will automatically be refreshed showing the latest messages.
Messages can be added to the list using the following commands. The difference is in color coding. The “context” parameter is optional.
dBar.info(message:String, context:String);
dBar.error(message:String, context:String);
dBar.debug(message:String, context:String);
dBar.warn(message:String, context:String);

Basic profiling using timers

I also added a “timers” tab to perform some basic profiling tasks on your code. You can add/ start and stop a timer by using the following commands:
dBar.startTimer( timerId:String );
dBar.stopTimer( timerId:String );

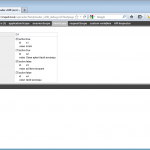
I extended the toolbar with stuff I also use regularly: lists of the contents of the various scopes (application, session, request, view), a list of variables always handy to have around, and Tommy Valand’s API inspector. Inspiration for this came from Ferry Kranenburg’s XPage Debug Custrom Control.

Improved object dumping

All variables from the various scopes are “dumped” in their respective tabs. This is done using a custom dumpObject function I’ve written. In most cases this function dumps more detailed information than the xe:dumpObject control from the Extension Library.

Usage and configuration

Including the toolbar is easy copy the following design elements to the application you’d like to use it in:
  • custom control ccDebugToolbar
  • (SSJS) script library xpDebugToolbar
  • XPage debugToolbarConsole (only required if you want to be able to “detach” the messages tab)
I’d recommend to always include the custom control and use the (custom) “load” property to indicate if it should be loaded or not. If set to false, nothing is rendered, but the xpDebugToolbar script library is included. This way all your log statements will not throw any errors (and won’t do anything). The defaultHidden custom control’s property can be used to set the default state of the toolbar. If hidden, only a small indicator is shown at the top of a page to show the full toolbar. Note that due to the order of events in XPages and custom controls, you can’t add log messages to the beforePageLoad event.
The XPage Debug Toolbar can be downloaded from the project site at OpenNTF. The application features a demo page that shows how to use the toolbar.

Screenshots

HTML Mails from XPages – part 2: inline images

I’ve updated the HTML mail SSJS library I wrote about yesterday and have added inline images support. This can come in handy when you want to create HTML newsletters.

Marking an image as “inline” can be done by adding an extra parameter to the addDocAttachment() / addFileAttachment() methods:

mail.addDocAttachment( "5203C670815BC8C4C12579270029C543", "header.gif", true );

The addDocAttachment/ addFileAttachment methods now return the Content ID of the image in the message. That ID can then be used to reference the image in the contents:

var headerImgId = mail.addDocAttachment("5203C670815BC8C4C12579270029C543", 
  "header.gif", true);

mail.addHTML("<table><tbody><tr><td>");
mail.addHTML("<img src="" + headerImgId + "" />;");
mail.addHTML("</td></tr></tbody></table>;");

If I send an email to my GMail account using my library containing only inline images, the email is considered not to have attachments (no paperclip icon in the messages list). If you have also chosen that images from that specific sender can always be shown, they also don’t show up at the bottom of the message (in the section containing all attachments).

To test if everything worked correctly I downloaded a sample HTML email template from FreeMailTemplates.com, uploaded all images to a sample database and created a mail message. In the downloaded index.html file I removed all line-breaks (rn) and tabs (t) using Notepad++. I then added the HTML (starting at the first table tag) to the message using the addHTML() method. I replaced all referenced images as described above. The message I received in GMail looked exactly how it was supposed to look:


I’ve tested the inline image functionality in GMail and Notes 8.5.3. You can download the library here.

Send a HTML mail from an XPage with only 5 lines of code

Sending an e-mail from an XPage (using SSJS) is not too difficult, especially if you’ve done it before in LotusScript:

var doc:NotesDocument = database.createDocument();

doc.replaceItemValue("form", "Memo");
doc.replaceItemValue("sendTo", "mark@domain.com");
doc.replaceItemValue("subject", "hi there!");
doc.replaceItemValue("body", "content here");
doc.send();

It gets a bit more difficult though if you want to send out HTML mails. To create those you need to work with stuff like MIME entities, MIME headers and streams.

I’ve created a SSJS library that makes it easy to create HTML mails. It allows you to do the following:

  • create HTML mails in a really simple way
  • add one or more attachments, either from document or files on the server
  • change the sender (name and email address)

To use the library you first need to add it to your application: create a new SSJS script library, call it xpHTMLMail and copy this code from the XSnippets site to it.

Next, in the code where you want to use it you can import that library by adding the following:

import xpHTMLMail;

To create a basic HTML message you write:

var mail = new HTMLMail();

mail.setTo( "john@domain.com" );
mail.setSubject( "Hi there!" );
mail.addHTML( "&lt;b&gt;Hi there!&lt;b&gt;" );<br clear="none" />mail.send();

You can add more HTML to the body of the email by making subsequent calls to the addHTML() function. The library also has methods to set the CC or BCC users:

mail.setCC( ["pete@domain.com", "mike@domain.com"] );
mail.setBB( "anna@domain.com" );

The setTo(), setCC() and setBCC() methods accept a string or array of strings.

What about attachments?

The class has two methods to add attachments to a message: you can add them either from a document in the current application or from a file on the server.

1. To add a file from a document you need to specify the document’s unid and file name:

mail.addDocAttachment("5203C670815BC8C4C12579270029C543", "jellyfish.jpg");

Note that files from documents are read directly from the document into a stream and added as a MIME entity to the message. The files aren’t extracted first.

2. To add a file that’s store somewhere on the server’s filesystem you need to specify its path and file name:

mail.addFileAttachment( "c:/temp/", "report.pdf");
Changing the sender

The sender of the message can be changed by using the setSender() method. You have to specify an e-mail address and can optionally specify a name:

setSender("user@domain.com");

or

setSender("user@domain.com", "Some User");

The order of events in XPages

After reading another question on the XPages forum about which (serverside) events are triggered if you use the browsers “back” button on on XPage, I decided to run some tests.

First thing I did was to set up a simple test XPage (page1.xsp):

<?xml version="1.0" encoding="UTF-8"?>
<xp:view xmlns:xp="http://www.ibm.com/xsp/core">

<xp:this.beforePageLoad>
<![CDATA[#{javascript:print("beforePageLoad")}]]>
</xp:this.beforePageLoad>
<xp:this.afterPageLoad>
<![CDATA[#{javascript:print("afterPageLoad")}]]>
</xp:this.afterPageLoad>
<xp:this.afterRestoreView>
<![CDATA[#{javascript:print("afterRestoreView")}]]>
</xp:this.afterRestoreView>
<xp:this.beforeRenderResponse>
<![CDATA[#{javascript:print("beforeRenderResponse")}]]>
</xp:this.beforeRenderResponse>
<xp:this.afterRenderResponse>
<![CDATA[#{javascript:print("afterRenderResponse")}]]>
</xp:this.afterRenderResponse>

<xp:link escape="true" text="Go to page 2" id="link1">
<xp:this.value><![CDATA[#{javascript:"page2.xsp"}]]></xp:this.value>
</xp:link>

</xp:view>

The order of events triggered when opening this XPage is as expected:

  • beforePageLoad
  • afterPageLoad
  • beforeRenderResponse
  • afterRenderResponse


Note that the afterRestoreView event isn’t executed: that event gets only executed after a (partial) refresh of the page.

If I open another XPage (page2.xsp) from my sample page using the link on page 1 and then click the browser’s back button (or a clientside link calling history.go(-1) ), no events are executed at all. That’s because the page is served from the browser cache, despite the fact that a Expires header is added by default with a value of -1 !


Control caching using a Cache-Control header


The Expires header is one way to control caching, the Cache-Control is another, so I checked what would happen if I added that one. I added this to the beforePageLoad event of page1:

var exCon = facesContext.getExternalContext();
var response=exCon.getResponse();
response.setHeader("Cache-Control", "no-cache");

That didn’t change anything, so I tried another:

response.setHeader("Cache-Control", "no-store");

(read this for the difference between no-cache and no-store)

That changed something: using the back button now causes page1 to execute the same list of events as mentioned before. So it seems that the no-store header actually causes the XPage not to be cached at all and opening an XPage using the back button had the same effect as initial opening it.

onClientLoad

With that in mind I tried something else: I added a serverside onClientLoad event to page 1:

<xp:eventHandler event="onClientLoad" submit="true" 
  refreshMode="norefresh" execMode="partial">
<xp:this.action><![CDATA[#{javascript:print("ocl");}]]></xp:this.action>
</xp:eventHandler>

As you can already see from the syntax, this event is different from the other XPage events. If you now open page 1, the XPage instantly performs a POST request to handle the onClientLoad event. That in turn causes the beforeRenderRespons, afterRenderResponse and afterRestoreView events to be executed.

If I know open page 2 and click the browser’s back button those events are also executed. So by adding an onClientLoad event you can force events to be executed (with the downside of an extra POST request on every access of the page).